
External Factors
Salt buildup
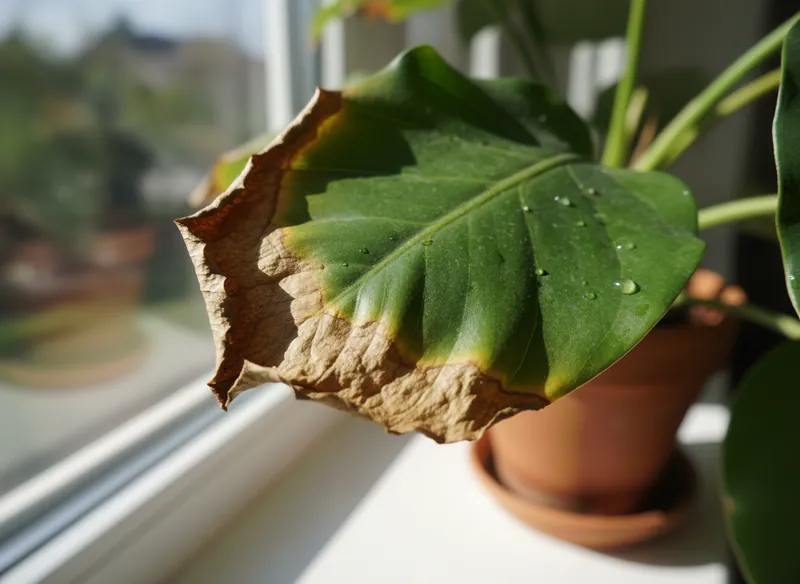
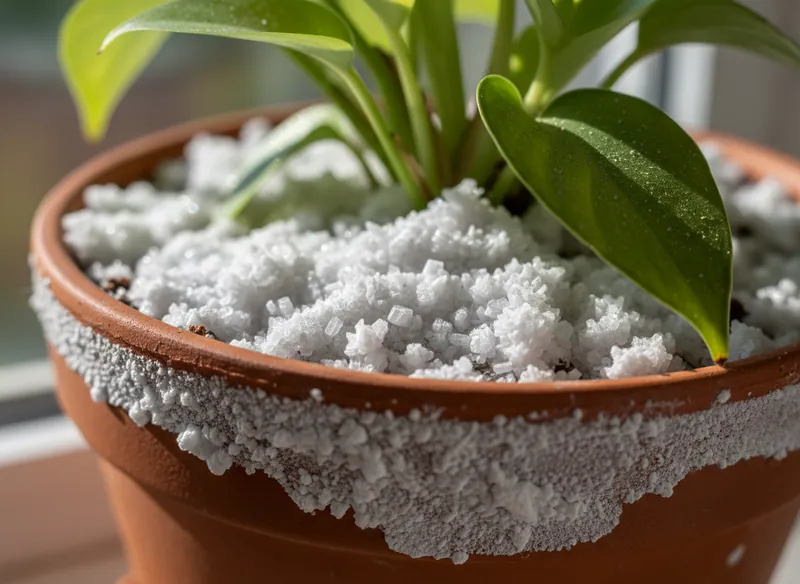
Brown leaf tips and a white crust on the soil.
Salt buildup is an accumulation of minerals in the growing medium from irrigation water and fertilizer. This high concentration prevents roots from absorbing water, creating “physiological drought” even in moist soil. Without intervention, salts burn roots, causing leaf tissue to die from the tips toward the base, and can kill the plant.
Signs to check
- Dry, brown, brittle leaf tips and edges.
- White or yellowish crystals on the soil surface and pot rim.
- A plant that looks thirsty, with soft or drooping leaves, despite moist potting mix.
- Noticeably slowed or completely stopped growth.
What you may notice
- Brown leaf tips · Leaf tips turn brown, dry, and brittle, with a clear boundary between healthy and affected tissue.
- White crust on potting mix · A hard, white deposit forms on the surface, creating a crystalline or powdery-looking crust.
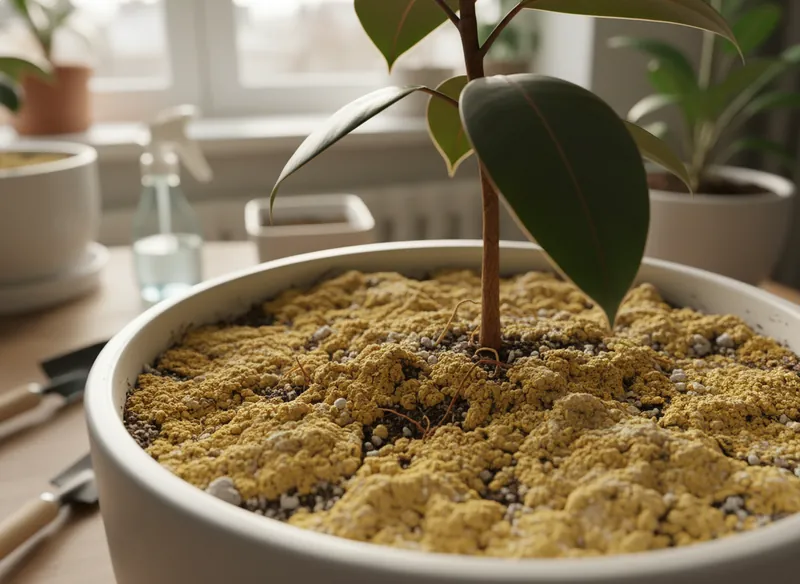
- Yellowish crust on potting mix · A dry, granular, whitish-yellow deposit forms on the surface of the growing medium, creating a thin, hard crust.
- Curling leaves · Leaves curl or roll upward or downward while remaining green.
- Dry, brown leaf edges · Brown, brittle drying appears along leaf edges or tips and spreads toward the center of the blade.
What to do now
Flush salts from potting mix
- Place the plant in a sink, shower, or outdoors, where water can drain freely.
- If a salt crust is visible, gently scrape off and remove the top 1 to 2 cm (about 0.4 to 0.8 in) of potting mix.
- Water the potting mix slowly and thoroughly with lukewarm water. Use a volume of water equal to 2 or 3 times the pot volume.
- Let water drain completely through the drainage holes for 15 to 20 minutes. This carries away accumulated salts.
- Always empty the saucer. Never leave the plant standing in the salt-laden water you have just flushed out.
- Wait until the surface of the mix dries before watering again, and wait 2 to 4 weeks before resuming fertilizer.
Refresh the potting mix
- Gather your supplies: a new pot with drainage holes, only 2 to 4 cm (about 0.8 to 1.6 in) wider in diameter, and fresh potting mix suited to your plant.
- Gently remove the plant from its old pot. Squeeze the sides of a plastic pot or run a thin blade around the inside wall to release it.
- Inspect the root ball. Gently remove as much old mix as possible with your fingers, taking care not to damage healthy roots excessively.
- Cut away dead roots. Use clean scissors to remove all roots that are brown, soft, or dry.
- Add fresh mix to the bottom of the new pot. Center the plant with the top of the root ball about 2 to 3 cm (0.8 to 1.2 in) below the rim.
- Fill around the sides with fresh mix, pressing lightly to remove air pockets. Do not compact it too much.
- Water moderately to settle the new mix around the roots. Empty excess water from the saucer after a few minutes.
Prevention
- Flush preventively every 4 to 6 months, especially if you fertilize regularly.
- Use rainwater, filtered water, or demineralized water to reduce mineral salt inputs.
- Always fertilize moist potting mix to avoid burning roots.
- Make sure every pot has working drainage holes to prevent standing water.
- Leach, or flush, the soil every 3 to 4 months by watering thoroughly until water drains out and carries salts away.
- Occasionally use filtered water, rainwater, or demineralized water to reduce mineral inputs.
- Follow recommended fertilizer doses to avoid overloading the soil with salts.
- Check that the pot always has adequate drainage to prevent water from standing.