
External Factors
Overwatering
Soil stays waterlogged, depriving roots of oxygen and causing rot.
Excessive watering saturates the growing medium, eliminating the oxygen roots need to breathe. Without oxygen, roots rot and can no longer absorb water or nutrients, paradoxically causing the plant to wilt. If this continues, rot spreads to stem bases, causing the plant to collapse irreversibly.
Signs to check
- Soil feels waterlogged, even several days after watering.
- Leaves and stems are soft and drooping despite moist potting mix.
- Lower leaves yellow and then drop; some fall while still green.
- The potting mix smells musty or rotten.
- Stem bases near soil level become soft, brown, or black.
What you may notice
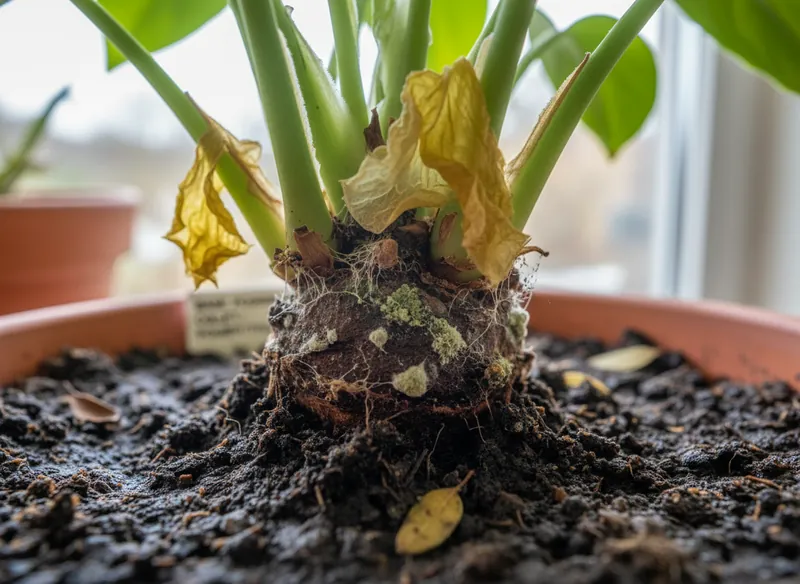
- Rotten stem base · The stem base at soil level becomes soft and brown or black, and may collapse.
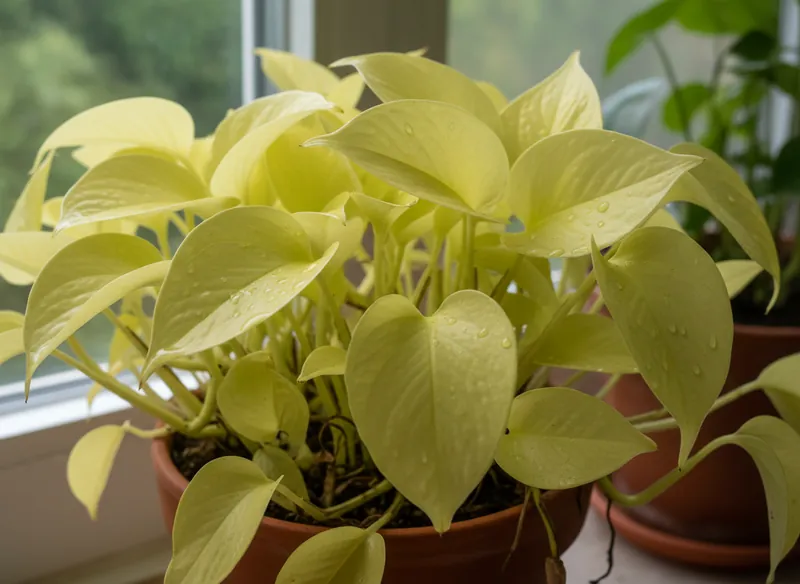
- General leaf yellowing · Pale yellow discoloration spreads through the foliage, often affecting the oldest leaves first.
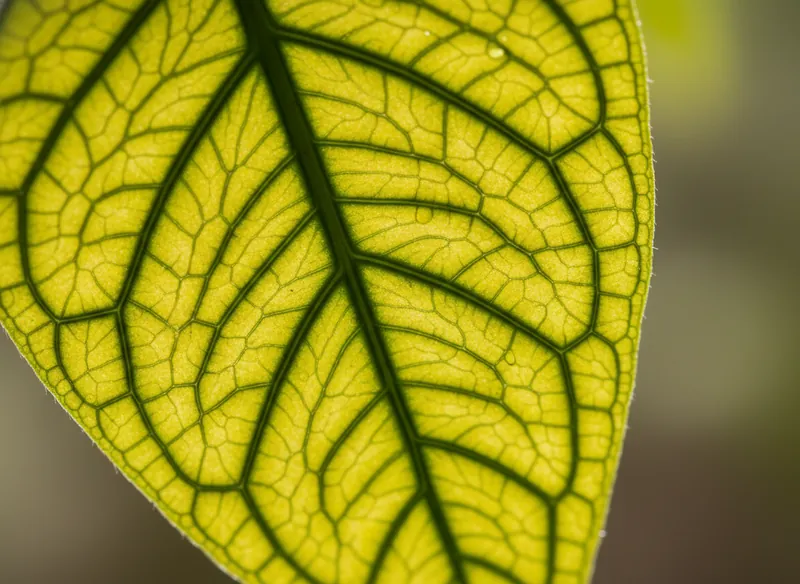
- Yellow leaves with green veins · Leaf tissue yellows between veins that stay green, creating a contrasting network pattern.
- Wilting leaves · Leaves and stems lose rigidity, become soft, and visibly droop, making the whole plant look tired.
- Wilting flowers · Flowers and petals lose firmness, soften, and droop on their stems instead of standing upright.
- Soft, drooping stems · Stems lose rigidity, bend, and hang downward instead of remaining upright and firm.
- Mold on the soil surface · A white or yellowish, cottony or powdery deposit develops on the potting mix surface.
- Leaf rot · Soft, wet-looking brownish to black areas appear and gradually expand across leaf blades.
- Soft stem rot · A stem section becomes soft, watery, and discolored, often causing the plant to collapse or break.
- Soft, rotten roots · Roots lose firmness, turn brown or black, and fall apart easily when touched, sometimes with a musty smell.
- Yellowing lower leaves · The oldest leaves at the plant's base turn uniformly yellow before drying and falling.
- Unpleasant smell from potting mix · A sour, sulfurous, or rotten smell comes from the mix, especially just after watering or when it is disturbed.
- Twig and stem dieback · Stem or twig tips turn brown, dry out, and gradually die back toward the plant's base.
- Stem tip dieback · The upper ends of stems or branches dry out, blacken, and die, with damage then progressing toward the plant's base.
What to do now
Restore waterlogged potting mix
- Stop watering immediately. Do not add another drop.
- Gently remove the plant from its pot to inspect the roots. This is the most important step.
- Examine the root system: healthy roots are white and firm, while rotten roots are brown, black, and soft, and detach easily.
- Using clean, disinfected pruners or scissors, cut away all rotten roots. Keep only the healthy portion of the root system.
- Discard the old, waterlogged mix and clean the pot with hot soapy water to kill the fungi and bacteria responsible for rot.
- Repot in fresh, dry, well-draining potting mix. Choose a pot only slightly larger than the remaining root volume.
- Wait at least 3 to 5 days before the first very light watering. The plant needs time to heal and form new rootlets.
Emergency repotting to improve drainage
- Phase 1: Preparation (15 min)
- Act immediately; every hour counts. Prepare a clean new pot with drainage holes, fresh, very well-draining potting mix containing perlite or bark, and scissors or pruners disinfected with alcohol.
- Phase 2: The procedure (45–90 min)
- Gently remove the plant from its pot. If it resists, squeeze the sides of the pot or run a blade around the inside edge.
- Gently remove all the old potting mix from around the roots. Rinse them under a gentle stream of lukewarm water so you can see their condition.
- Inspect the roots. Healthy roots are firm and white or light-colored. Thoroughly cut away all roots that are brown, black, soft, or mushy.
- Repot into the new pot using completely dry potting mix. Keep the crown, the base of the stem, at its previous level.
- Phase 3: Recovery (several weeks)
- DO NOT water immediately. This is crucial. Wait 5 to 7 days before a first, very light watering. This forces the roots to seek water and encourages healing.
- Place the plant somewhere bright, but out of direct sunlight, to reduce stress during recovery.
Prevention
- Always check moisture 5 cm (about 2 in) deep with your finger before watering.
- Always use pots with drainage holes.
- Empty the saucer 30 minutes after every watering so roots do not sit in water.
- Adjust watering to the seasons: reduce it significantly during fall and winter where growth slows then.
- Always check that the top 3 to 5 cm (about 1 to 2 in) of mix are dry before watering.
- Use only pots with drainage holes.
- Empty the saucer 30 minutes after watering to prevent standing water.
- Adjust watering to the season, using less during winter dormancy where it occurs.
- Choose an airy mix containing materials such as perlite, pumice, or bark.