
External Factors
Underwatering
The soil is dry and leaves are limp and drooping.
A lack of water prevents the plant from maintaining pressure (turgor) in its cells, which is essential for supporting stems and leaves. This happens when the plant loses more water through evaporation than its roots absorb, leading to overall wilting. If water stress continues, growth stops and lower leaves turn yellow and fall to conserve resources, potentially leading to the plant's death.
Signs to check
- The potting mix feels dry to a depth of 5 to 7 cm (about 2 to 2.8 in).
- Leaves and stems are limp and droop downward.
- The pot feels much lighter than usual when lifted.
- The plant visibly perks up within 2 to 3 hours after thorough watering.
- Leaf edges may become brown, dry, and brittle to the touch.
What you may see
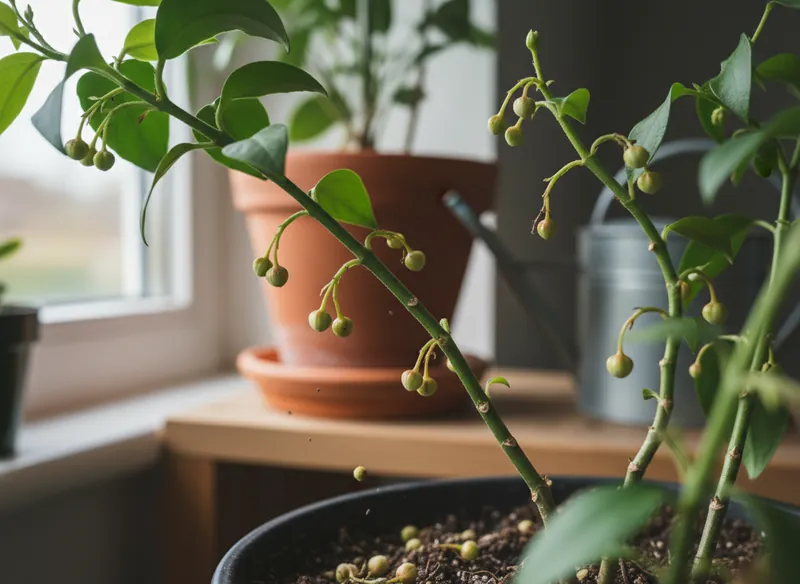
- Flower bud drop · Unopened flower buds dry out or turn yellow, then fall from the plant before they can bloom.
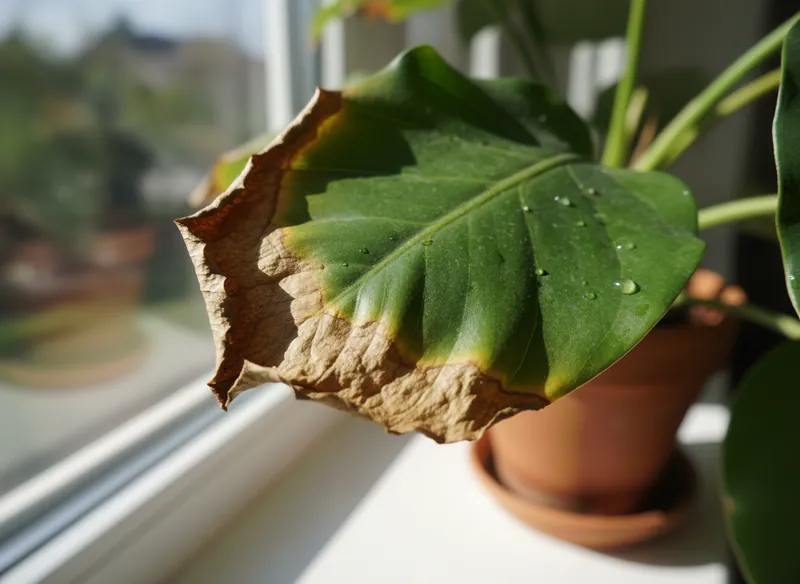
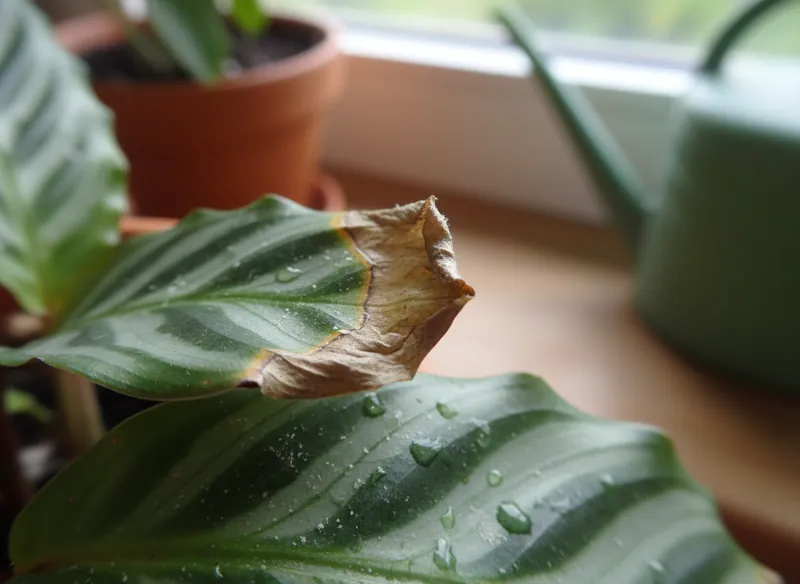
- Brown leaf tips · Leaf tips turn brown, dry, and brittle, with a clear boundary between healthy and affected tissue.
- Stem tip dieback · The upper tips of stems or branches dry out, turn black, and die, with damage then progressing toward the base of the plant.
- Drying branches and stems · Stem or branch tips turn brown, dry out, and die progressively downward toward the base of the plant.
- Drying flowers · Flowers or flower buds turn brown, dry, and brittle to the touch, sometimes affecting only petal edges.
- Entire plant dry and brittle · The entire plant, including stems and leaves, is dry and brittle to the touch, with uniform brown or yellow coloring.
- Curled or shriveled leaves · Young leaves become distorted and curl in on themselves, often downward or inward, creating a puckered appearance.
- Leaf curling · Leaves bend or curl in on themselves, upward or downward, while retaining their green color.
- Wilting leaves · Leaves and stems lose their firmness, become limp, and visibly droop, giving the whole plant a tired appearance.
- Wilting flowers · Flowers and petals lose their firmness, become soft, and visibly droop on their stems instead of standing upright.
- Soft, drooping stems · Stems lose their firmness, bend, and hang downward instead of standing upright and firm.
- Hanging or drooping flowers · Flowers and their stalks lose firmness, drooping and pointing downward instead of standing upright.
- Dry, brown leaf edges · Dry, brown, brittle tissue appears along leaf edges or tips, progressing toward the center of the blade.
- Leaning or tilted plant · The main stem or whole plant leans markedly in one direction instead of growing vertically.
- Slow stem growth · The plant produces few or no new stems and leaves, and its overall height remains unchanged for several weeks or months.
- Yellowing lower leaves · The oldest leaves at the base of the plant turn uniformly yellow before drying out and falling.
What to do now
Rescue by soaking
- Act immediately. Fill a sink, bathtub, or large bucket with room-temperature water.
- Lower the plant's pot into the water. Make sure the water reaches about three-quarters of the pot's height.
- Let the plant soak for at least 30 to 60 minutes. You will see air bubbles escaping, a sign that the potting mix is rehydrating. Soaking is complete when the surface of the mix is visibly moist.
- Remove the plant from the water and let it drain completely in a sink for 15 to 20 minutes. Never leave standing water in the saucer.
- Place the plant in a bright spot out of direct sun for the next few days. Direct sun would add stress to a recovering plant.
Retain moisture with mulch
- Choose a mulch suited to indoor use. Clay pebbles, lava rock, and pine bark are excellent choices.
- Clean the surface of the potting mix. Remove dead leaves or other debris for a clean base.
- Spread an even 2 to 3 cm (about 0.8 to 1.2 in) layer of mulch across the entire pot surface.
- Leave a small, clear 1 cm (about 0.4 in) gap around the plant's main stem to avoid any risk of rot.
- Water lightly just after installation to help the mulch settle into place.
Prevention
- Check potting mix moisture 5–7 cm (about 2–2.8 in) deep before watering.
- Adjust watering frequency to the seasons: less in winter where water use decreases, more in summer where it increases.
- Always use pots with drainage holes.
- Never wait for the potting mix to shrink completely away from the pot's edges.
- Check moisture in the potting mix beneath the mulch before every watering.
- Check mulch depth every 6 months and top it up if needed.
- Use a mineral mulch, such as clay pebbles or sand, to discourage fungus gnats from laying eggs.